Troubleshooting adapter module JCo RFC calls
Posted: February 2, 2014 Filed under: SAP, SAP ABAP, SAP Java, SAP PI/PO | Tags: ABAP, java, SAP, SAP PI Leave a commentFrom my blog on SCN – http://scn.sap.com/community/pi-and-soa-middleware/blog/2013/12/23/troubleshooting-adapter-module-jco-rfc-calls
Many a times we have adapter modules ( AM ) which in turn do a RFC call to ABAP stack of the XI system to retrieve information. This can be handy to make a generic AM that can be plugged in for multiple interfaces.
As an example, if we already have a text file with idoc data in plain text format, the adapter module can be used to convert this data into idoc format. The ABAP stack FM can be created to inquire idoc metadata information in IDX2 and use it to create the idoc structure.

The different steps are as follows:
1.This step shows the data being processed in the module chain. It’s represented in hex format for the message. So, if we have a text file with content “hello” – the message will be “68 65 6c 6c 6f”.
2.The message is entering the module chain. It can be after reading the file for a sender FTP adapter if this is the first module or after another module call e.g. for code page conversion.

3.As part of the adapter module processing, a RFC call is made using Java Connector ( JCo ) with the message and other parameters. These will be adapter module parameters.
4.The returned message is idoc data in hex format of the XML stream.
5.The message is leaving the adapter module.
6.The data is in hex for the idoc. To make it simple, if the idoc data is “<hello>” the message here is “3c 68 65 6c 6c 6f 3e”.
In the above diagram, the module parameters are sent to the RFC function module in text format though the message data will be hex.

Link:http://help.sap.com/saphelp_nw04/helpdata/en/9a/20e23d44d48e5be10000000a114084/content.htm
With all the above theoretical knowledge, let’s create a simple Java program that can aid in troubleshooting.Pre-requisite Libraries to be added to our project:
1. Google Guava :
Get it from here – http://code.google.com/p/guava-libraries/
2. JCO libs
Get it from service marketplace.
3. Create a jar with the property file: I’ve provided a sample property file. It has the details to make us connect to the host, authenticate
Files to be created:
1. Props.properties : to store connection / authentication details so that it’s easy to change the target instead of hardcoding the values in the program.
2. PropHelper.java : Helper class to read properties file.
3. simulateRFCBean: This is the main class – it’s used for reading the file and making the JCo RFC call.
The steps will be:
1.Check the function module for parameters of type IMPORT (or ask your friendly ABAP colleague about the function module.)

This FM requires two parameters:
SOURCE (the message sent as hexadecimal stream).
SNDPRN (This is a just normal text)
The names won’t have to necessarily match as within the module, we map parameter ‘partner’ to ‘SNDPRN’ for the RFC call.
2.Map the data types to Java using the table mentioned above.
Looking at the function module and the data mapping, we’ll need to
a) Convert the file contents to a hexadecimal string ( byte array in Java )
b) Send the sending system as a string ( String in Java )
3.With the above information, it’s straight forward to create the Java program.
a)Read the JCO properties – PropHelper.java is a helper class to help read these properties instead of hardcoding in the program.
b)Read the file to be checked and convert to byte array.
byte[] fileData = Files.toByteArray(new File(“C://temp//bad3.txt”));
– Do the necessary JCO Set up, set the parameters to be supplied for the RFC call
function.getImportParameterList().setValue(“SOURCE”,fileData);
function.getImportParameterList().setValue(“SNDPRN”,”TESTSENDER”);
and finally, make the call.
function.execute(destination)
Now with the set up done, we’re able to replicate the error scenario.
The issue on the communication channel log indicated.
![]()
Using this program, we’re able to replicate the failure.

For debugging on ABAP, an external break-point needs to be set up in the called function module.

Some of the error scenarios we encountered:
- Bad data – new line appearing in the message.
- IDX2 configuration missing for the unique message combination – existing for the basic type and an extension.
However, once we’re able to simulate the failure and debug the issue, finding the resolution is much easier.
Sourcde code link : https://github.com/viksingh/SimulateRFCCalls
Job Scheduling on SAP PO ( SAP PI Java stack )
Posted: February 1, 2014 Filed under: SAP, SAP Java | Tags: java, SAP PI, SAP PO Leave a commentFrom my post on SCN : http://scn.sap.com/community/pi-and-soa-middleware/blog/2014/02/01/job-scheduling-on-sap-po-sap-pi-java-stack
Job Scheduling on SAP PO ( SAP PI Java stack )
Scheduled jobs are one of the most common mechanisms to carry out repetitive tasks. In SAP ABAP stack, we have a comprehensive functionality to schedule jobs in SM36/SM37 etc.
With SAP PO being a SAP AS Java system, there is a need schedule jobs to carry out repetitive housekeeping tasks. However, there could sometimes be additional information to be sent out from SAP AS Java system – an example could be custom information from SAP AS Java tables. There’re web services creates by SAP but in some situations they may not be comprehensive enough for our requirements and hence a way needs to be found to send this information out regularly.
The below diagram describes our requirement – the system on left is SAP PI Java stack.
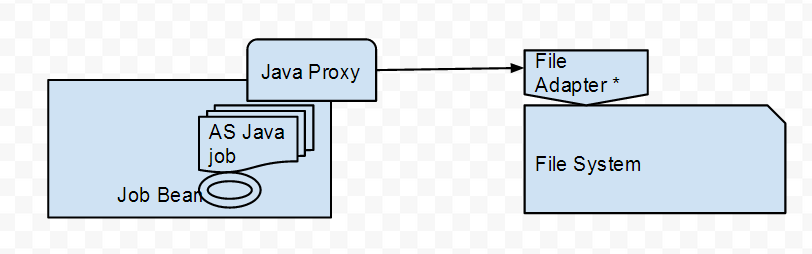
On the receiving side, it can be replaced by a different mechanism – e..g ABAP proxy if sending the information to an ABAP system.
Steps.
1. Generate proxy for outbound interface: The steps are already described in my previous blog.
We’re using asynchronous mechanism in this case .Verify that Interface pattern is Stateless.
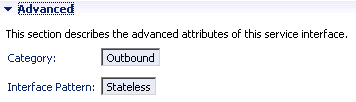
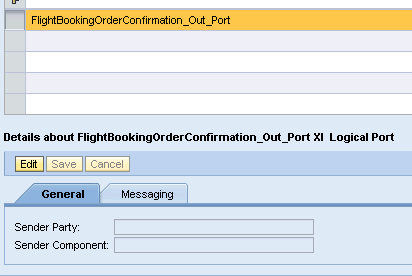
Initially I tried using a service interface with Stateless ( XI 3.0-Comptabible) but the generated proxy won’t have XI logical port .


Where as for FlightBookingOrderConfirmation_Out we get a XI Logical Port.
.
After this step, we have a web and an EAR project.
2. Generate a Job Bean : Create a normal EJB project and then use NWDS options to create a new “scheduler job”.
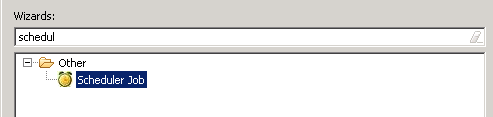
It’ll create an EJB project with a class file to write the logic for our job and extra descriptor files based on values provided in wizard.
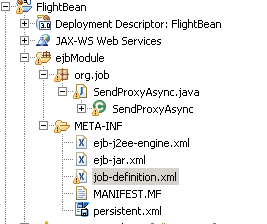
job-definition.xml is a descriptor unique for jobs and holds the job name.

It should match the values generated in the Java file.

Looking at the SendAproxyAsync.java where we implement the job execution logic, add the Proxy Service name.

Main parts of this class:
Logger can be created to log information useful in troubleshooting issues.
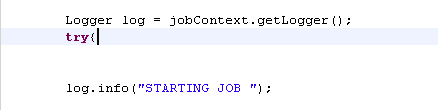
and of course any errors can be logged.
Now, do the usual bit – create XI contect objects, update business data to be sent out and do the outbound proxy call.
Deploy this project.
3. Create an iFlow for this scenario – Nothing too complicated here .We need to create an iFLow for the sender / receiver / interface values. Make sure that the sender communication channel has XI as the message protocol.
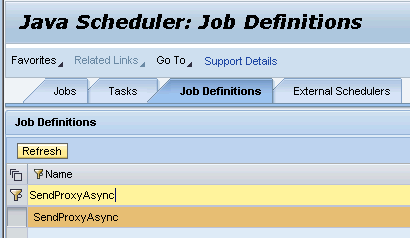
4. Set up in NWA:
We can look at the job definition in NWA by going to Java Scheduler -> Job Definitions.
As we have already deployed our project, we can see the job definition here.
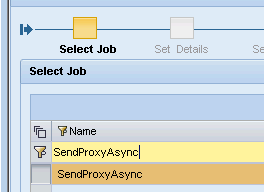
To start executing the job, we need to create a task specifying conditions ( as begin / end time / recurring frequency etc ) .
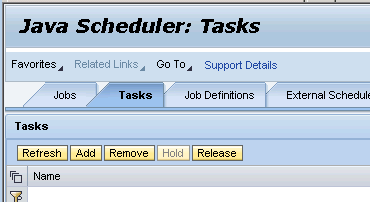
We select our job and complete the wizard – it’s similar to what we’ll give in SM37 on ABAP stack.
After this step, the jobs will start executing at the specified frequency.
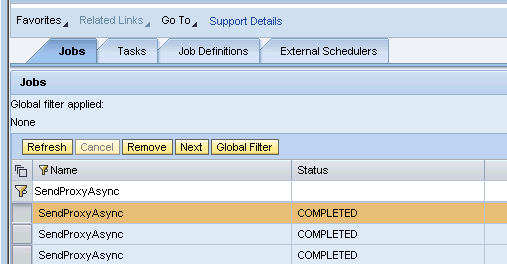
5. Testing:
‘’The executed jobs can be checked in the tab “Jobs”.
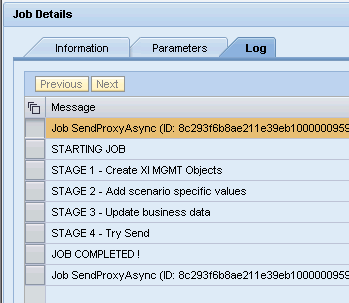
And a log can be displayed with the various messages we have put in the Job Bean – similar to messages on ABAP stack.
Verification : Navigate to PIMON and check messages
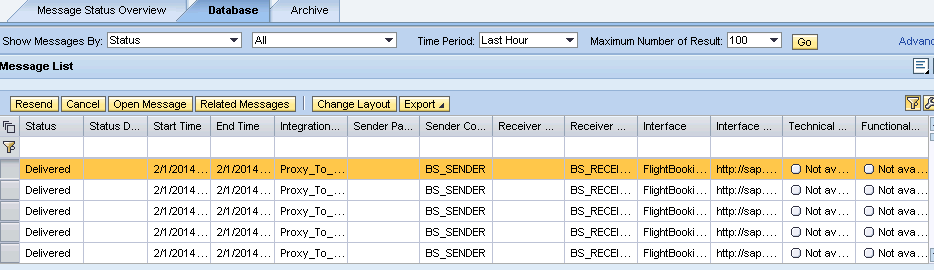
Logs confirm it’s working fine.
The code is at https://github.com/viksingh/PIJavaProxyAsJob . I’ve put the code for only the Java file as others are generated by wizards. For
troubleshooting, looking at system Java logs .
Implementing Sender Receiver Java proxy scenario in SAP PO/PI
Posted: February 1, 2014 Filed under: SAP, SAP Java, SAP PI/PO | Tags: java, SAP PI, SAP PO Leave a commentFrom my post on SCN – http://scn.sap.com/community/pi-and-soa-middleware/blog/2014/01/28/implementing-java-proxy-scenario-on-sap-po
I have been doing some work of late with Java proxies on SAP PO .I tried to use product documentation to understand their working. Product documentation is always the best source of information but things are much clearer for me after I’ve already developed something using a concrete example.
I hope that this post will be useful for anyone trying out SAP PI Java proxies. Here both the sender as well as receiver are Java proxies and it has been implemented on a 7.31 SAP PO system.
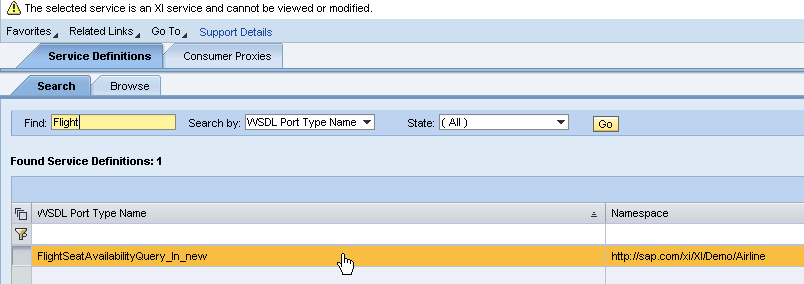
Scenario: We’ll use the flight demo model scenario with two Java proxies – interfaces FlightSeatAvailabilityQuery_Out_new for outbound service call and FlightSeatAvailabilityQuery_In_new for inbound service implementation.
Broadly, we’ll have three major objects:
Sender Proxy ( Consumer ) – Being sender, this proxy doesn’t provide any service but is used to make the outbound service call.
Receiver Proxy – It has the actual service implementation .
Servlet ( for testing ) – As the proxy calls are to be in an JEE environment, we’ll create a simple Servlet for testing.
At a high level, the below diagram shows what we’ll end up creating. We’ll need to create a configuration scenario as well but that shouldn’t cause too much grief.

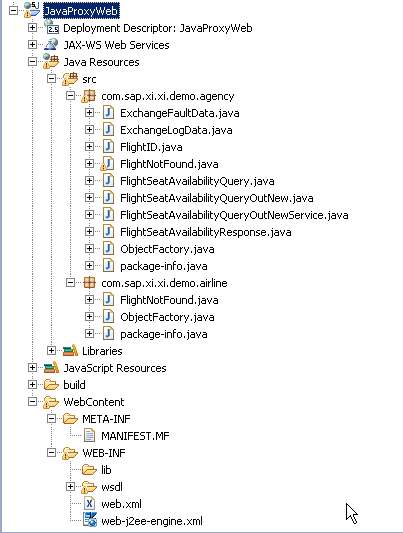
We need to create the below projects in NWDS. The names in italics are our project names.
a) Dynamic Web Project ( JavaProxyWeb ). This will hold consumer proxy (sender objects) and servlet used for testing.
b) EJB Project ( JavaProxy ) : This will hold service implementation on the receiver side.
c) EAR (JavaProxyEAR) – EAR to deploy JEE objects.
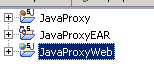
So we have the below three projects to start our work..
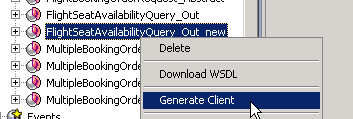
Consumer Proxy Generation
Let’s generate code on the sending side ( consumer proxy ) . We don’t want to chose a Javabean as there is no actual service implementation. We’re just generating client to call our proxy and hence chose “Generate Client”.
.
In the next screen , check the values of Server/ WebService runtime and verify your Dynamic Web Project and EAR project are chosen.
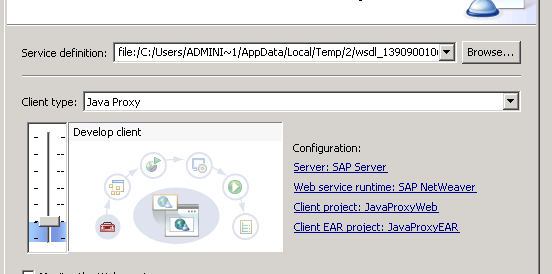
And we don’t have to WSDL as we’re not really using the end-points for any service all . We’ll be creating a configuration scenario in PI Designer to generate the configuration.
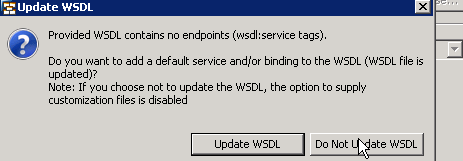
After that, let the wizard go through default values and just press finish.
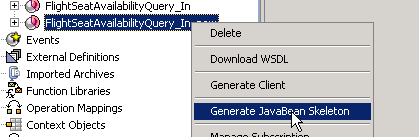
Inbound Service Generation
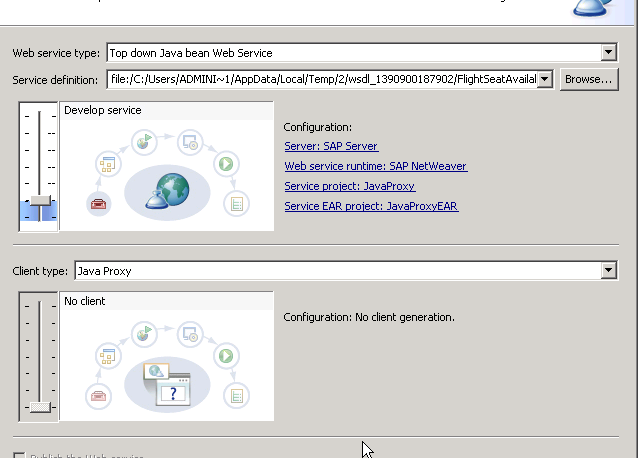
For our inbound service implementation, let’s take the corresponding service interface. This time we want to generate a bean and hence chose “Generate JavaBean Skeleton”.
And as we’re not really going to use any client, we can move the slider for client to minimum and just generate the shell for the Web Service.
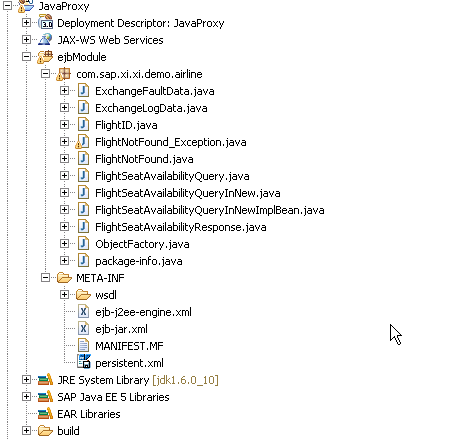
Our EJB project looks something like this.
And the web project should look similar to this.
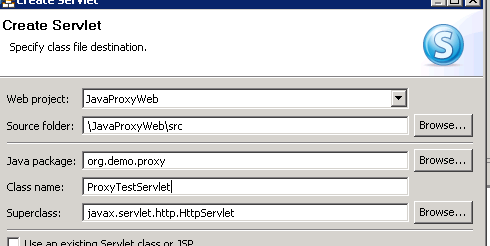
Adding Servlet to web project ( for testing )
As we need a servlet for testing, let’s create one in our web project.
Additions to servlet which makes the outbound proxy call object
Add the WebService annotation with the service name and create an instance of the Service.

This is the outbound service call. We need to create an instance of port and as we’re using XI as the message protocol, we need to use methods from XIManagementInterface.
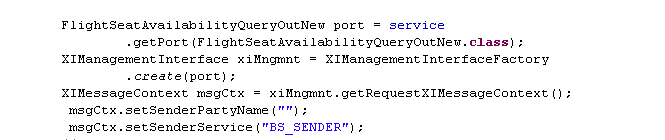
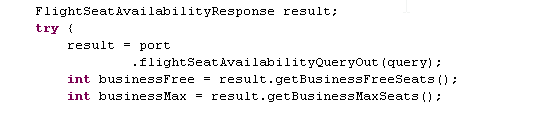
and the actual proxy call to get the result.
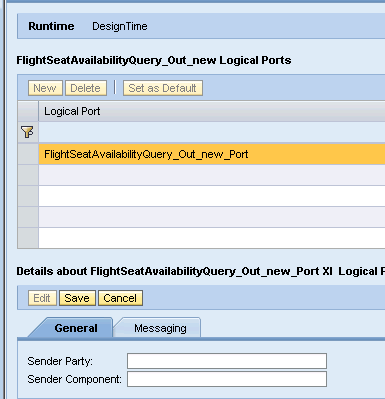
We have set the business system programmatically. It’s also possible to not set it here and instead set Party and Sender Service in configuration for Java proxies ( this appears once the project is deployed ) in Port Configuration.
Inbound Service Implementation
For the inbound service implementation, we’ll need to add @XIEnabled annotation and it’ll need @TransportBindingRT as well. Add @XIEnabled and IDE will help with @TransportBindingRT as they’re required together.

Project Deployment
Our EAR has our EJB as well as dynamic web project.Deploy the EAR .

Service verification in NWA
Once the project is successfully deployed, we should be able to find our consumer proxy . This was actually confusing for me. I tried to deploy the generated client without the actual service call in servlet and it never worked for me. Only when I created the servlet making the outbound call I could see the outbound proxy. It’s best to finish outbound proxy and inbound service implementation along with consumer application ( servlet in this case ) and then try to deploy them in one shot.
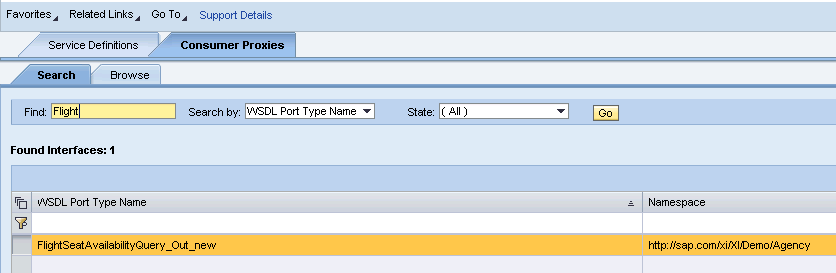
Below is the screenshot of the port configuration . We can set the party/ business system here if it’s not set programmatically.
Similarly, the inbound service shows up as well in Service Definitions.
Our development is done. Now, we need to create an integration flow with the required sender / receiver interface values.
Sender communication channel uses XI message protocol for a SOAP adapter and HTTP as the transport protocol.

Similarly, create a receiver communication channel of type SOAP, using HTTP as transport protocol and XI as message protocol.

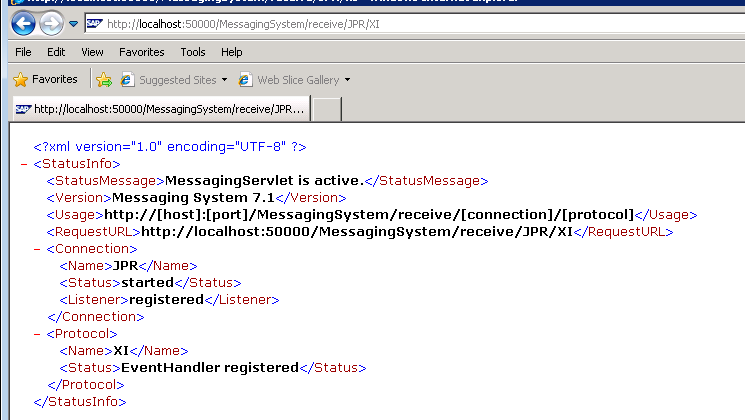
Path prefix for sending proxy messages bia JPR is /MessagingSystem/receive/JPR/XI.
Do a test with the URL going to be used on the receiving side to verify it’s running.
Now, configure the receiver communication channel. Change the authentication mode to “Use logon data to no-SAP system’ and provide
authentication credentials.

Activate the iFLow and we’re ready to test the set up.
Testing
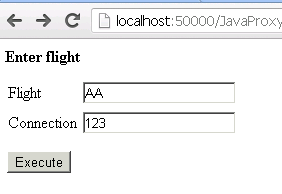
Fire the servlet and it should come up with the below screen
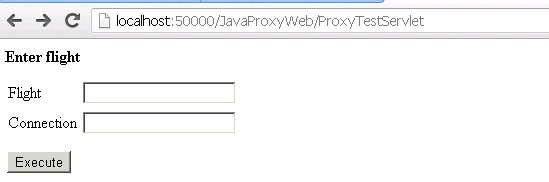
Put your flight and connection details. We aren’t really using the date and hence it’s not in screen.
And if everything goes well, we should get the below screen.
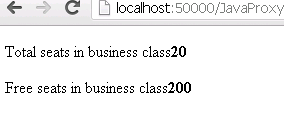
Voila ! Our proxy worked and it has come back with the response.
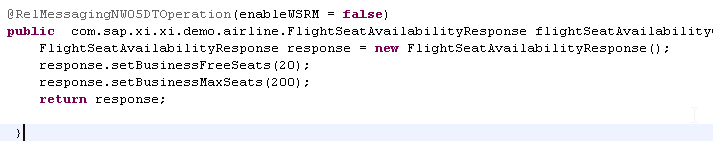
This matches with our service implementation – we’re just returning 20 free and 200 max business class seats .
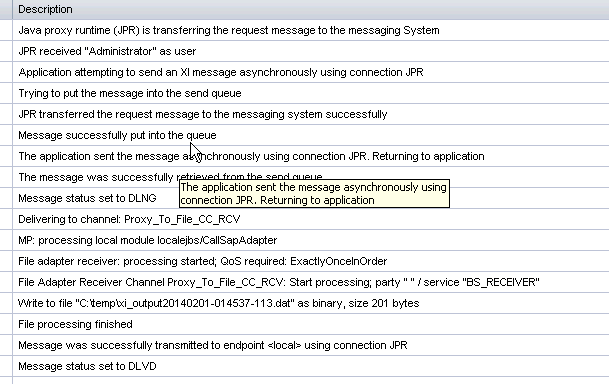
The message can be displayed in RWB / PIMON.

The audit log confirms that JPR has successfully delivered the message along with the response message.

The source code is available on https://github.com/viksingh/PIJavaProxy . I’ve just put the outbound proxy call in the servlet and the inbound service implementation as these are the two files we need to modify. Rest all were left standard including deployment descriptors.
Debugging Java applications on SAP PI/PO
Posted: February 1, 2014 Filed under: SAP, SAP Java | Tags: java, SAP PI, SAP PO Leave a commentFrom my post on SCN – http://scn.sap.com/community/pi-and-soa-middleware/blog/2014/01/25/debugging-java-applications-java-mapping-java-proxies-etc-on-sap-pipo
Below are the steps to debug any Java application on SAP PI/PO – they are generic for SAP AS Java server .It can be used to debug Java mappings, Java proxy calls in PI etc.
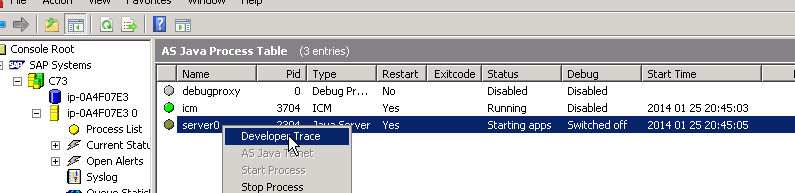
-Log on to SAP management console and click on developer trace. There is documentation of SAP AS Java ports here.
http://help.sap.com/saphelp_nwpi71/helpdata/en/a2/f9d7fed2adc340ab462ae159d19509/content.htm
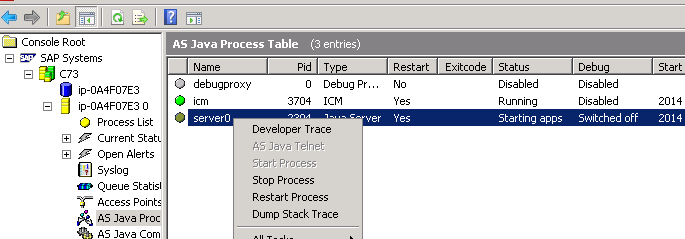
However, it’s easiest to just look at the Developer Trace and get the port number. You may need to ask Basis to supply this information as it requires access to SAP management console.
– In this case, the debugging port is 50021 .
– From SAP management console, enable debugging.

-The port number can also be verified by looking at debugging “Switched on (50021)” column.
– To debug the application, create a debug configuration in NWDS. It can be selected from Run -> Debug Configurations.
Use ‘Remote Java Application’ as the application type.


-Create the configuration specifying the project name and click on Debug.

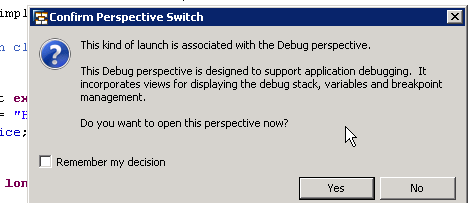
– This launches the debug mode.Confirm to use the debug mode.
– We’re ready to start debugging the Java code.
The code can be any Java object :
– I tested with SAP PI Java mapping – in this case you have to let the map execute by processing a message.
– This example is a SAP Java proxy I was testing and had issues in figuring out the error. Hence, I created a simple Servlet which fires a message.

and the Servlet can be executed allowing us to debug any J2EE application component.


I hope it’s useful for SAP PI developers as especially with single Java stack, there are going to be more Java objects created and being able to debug is efficient.
Furthermore, in PI Java mappings sometimes we need the actual data and environment to test the application and making a dummy call from main to call transform / execute can’t doesn’t provide the information. An instance of this could be a JDBC call to read a PI table.
Use SAP DCs and SAPUI5 to build development objects for SAP PI/PO
Posted: February 1, 2014 Filed under: SAP, SAP Java, SAP PI/PO, SAPUI5/OpenUI5, Software | Tags: java, SAP DC, SAP Java, SAP PI, SAP PO Leave a commentFrom my post on SCN – http://scn.sap.com/community/pi-and-soa-middleware/blog/2013/09/26/use-sapui5-and-sap-dcs-to-build-development-objects-for-pi-731
PI 7.31 introduces a Java only version of PI. This obviously is much more efficient for message processing. However, many existing XI/PI customers have built processing logic on ABAP stack. In this blog, we’ll look at the steps that can be carried out to create similar functionality on Java stack. I hope the information will be useful and I welcome any suggestions/comments.
I’ll take a sample use case – dynamic receiver determination based on custom table entries. ( i.e. based on file name, route the message to different receivers ). For our discussion, the table will be very simple – it has three columns : id, filename and receiver. Id is primary key and filename is the field that is compared to pattern match with the message’s filename to determine the receiver business system. The table is too simplistic and data won’t be normalized but let’s ignore that for now .
Of course, it can be easily implemented using XPath expressions in PI 7.31 but I’m using this as it covers a functionality that was often implemented by clients on ABAP stack and it’s a good use case as we can use it to show usage of persistence. On ABAP stack, this functionality can be implemented using the following approach.
- – Create an ABAP class (with interface IF_MAPPING ) for processing logic where lookup on custom table is performed. This ABAP class is used in the operation / interface mapping.
- – SM30 can be used for table maintenance
- – SE16 can be used to display table entries.
As shown in the below diagram, a message may arrive / leave at Java stack but the scenario used ABAP development infrastructure. Of course, it was not mandatory but given ABAP skill set being more widespread in SAP landscapes we had the below situation in many cases.

So in a file to file transfer, the FTP adapters (on Java stack ) will receiver / send files and an ABAP map is used to perform lookup to find the receiver.
Option from PI7.31 onwards:

The following approach could be taken to create similar functionality on Java stack:
- Create tables in Java dictionary.
- Since SAPUI5 is supported by SAP AS Java and is the recommended UI by SAP, it can be used to build display and maintenance screens.
- – For server side processing ,we can use servlets to handle requests from SAPUI5 client. We’ll need two servlets – one to display data entries already in database and a second one to create new entries.
- – Receiver determination class is on Java stack where we can use Lookup API in a java mapping program. This is a normal Java map and can be built using DatabBase Accessor. I won’t cover in this blog but the github link for this project has the code which can be referred.
To keep the model simple, we can perform database operation in the servlet itself via JPA and not really go via EJBs. EJBs can be used for more complicated scenarios.
Additional Libraries Required:
- As it’s much more easier to use JSON with any Javascript library including SAPUI5, we’ll use Google GSON libraries to convert server side response to a JSON message.
Hence, our development objects will look somewhat like this.

We’ll use SAP Java Development Components ( DCs ) to leverage benefits of NetWeaver Development infrastructure for lifecycle management.
Some customers may still want to maintain the database on ABAP stack ( e.g. in their ECC system / SOLMAN etc .) and have it replicated to Java stack. In these cases, the messages can be sent to Java AS over HTTP via a RFC destination by tying it in with changes over ABAP tables. In case servlet expects/ returns JSON messages, we can use the standard ABAP class /SDF/CL_E2E_XI_ALERT_JSON_DOC / use SCN’s code exchange to get the JSON tool in case your ABAP system doesn’t have this standard JSON processing class.
In this case, the scenario will look like as below.

Implementation Steps ( our original scenario using SAPUI5):
- Google GSON libraries: Create a DC of type external library with Google GSON jar to package the required libraries. This is required as the servlet response will be in JSON format which can be easily interpreted by the client side SAPUI5 JavaScript code.
- – Create a DC for external library and add the jar file to libraries folder.

Change the access to allow access for both COMPILATION as well as ASSEMBLY.

- – Ensure that both public parts have jars.

2. Create a dictionary DC. It’ll have an ID column and FILENAME and RECEIVER columns. Based on FILENAME, we’ll determine the RECEIVER.

Create dictionary and deploy it to SAP Java Server.

- – Create an additional TABLE for generating keys. We’ll use this later for primary key generation.

- – Verify that the table exists on database. You may switch to database development perspective. Create a connection using your dB connection details.

3. Create an EE application of type “Web Module” and perform the following steps:
- Add JPA support by modifying project facet.


- – Generate entities from tables. This will generate a class for the database table.


It should already have the below annotation.

As we’ll use key generation from a different table (TMP_KEYGEN) , the below annotations are required.

Update persistence.xml to change the transaction type as Local as we’ll be managing transactions in servlet code while persisting data.

- Add SAPUI5 libraries – Refer to the below blog for detailed steps.
- http://scn.sap.com/community/bpm/blog/2013/01/14/developing-sap-ui5-applications-in-sap-netweaver-developer-studio–part-22
- In summary:
- Add SAPUI5 SCAs and put dependency for both the DC as well as the SC.
- Add SAPUI5 Javascript libraries.
- Add SAPUI5 Java libraries.
- Update web.xml to add components required for SAPUI5
- – We’ll create two servlets: RetrieveData will display existing table entries and UpdateData is used to create entries. Both servlets will need to have the JPA information injected at runtime and hence we need the following annotation / declaration.

RetrieveData servlet will return all values in the database.

- – UpdateData inserts values to the database table:

write( response, map ) is a helper method has been written to write the JSON response – it’s the last 3 lines of the previous servlet.
Nothing too fancy in html file – it calls the main view.
![]()
I won’t go throught the entire JS code. Essentially it builds the views shown later below. The Javascript code invokes GET method on RetrieveData servlet. Here, we invoke a GET method on RetrieveData servlet and push the result into an array which can later be bound to a table that will be displayed.

And code to trigger POST. We just display an alert message .

Java files structure for the web module:

and files for UI in the web module:

This is how the project DCs look.

Dictionary DC was created and deployed separately as it doesn’t have to be part of this EAR.
jsonlib: Has Google GSON libraries for Java processing.
detcvr: It’s the webmodule – It has servlet , views as well as JPA generated entity file.
dtrcvear: It is our EAR to deploy the application to SAP AS Java.
This is how the screen turns out to be. We can maintain values :

And entries are dsiplayed using the “Display Routing Values” tab.

To test in PO, create an iFLow with two receivers, one default and the second one will be determined based on Java map which will perform a lookup on the table to get the receiver business system based on filename. Configure Routing with Dynamic Message Router

and process two files: First with an arbitrary name and second one has name starting with IN which was updated in our dB by SAPUI5 application. Based on the table entry, the message is routed to BS_DUMMY_IN business system.
![]()
The code for this project can be referred at https://github.com/viksingh/PIDYNAMICRCVDCs .
Automating user registration in SUP
Posted: February 1, 2014 Filed under: SAP, SAP Mobile | Tags: java, Mobile, SAP Mobile, SMP Leave a commentI had originally posted this on SCN : http://scn.sap.com/community/mobile/blog/2013/05/30/automating-user-registration-in-sybase-control-center
This blog documents the solution I had worked on to automate user registration in SUP. We use a mobile solution for sales force automation providing SAP functionality on the mobile device. It’s an iOS native app using SUP as data cache and is authenticated against SAP. Hence, we need SAP users to be present in SUP. Usually the task of provisioning and controlling a user in SUP is done by a MDM solution but our MDM solution ( it’s not Afaria ) was not able to handle our iOS app which is around 500MB . Apart from being a sales force automation app allowing sales reps to work on the go, it has lot of picture contents about products which bloated the app size.
Here’s the landscape diagram relevant for the issue.
CUA system: Central User Administration. The users are created here and replicated to SAP ECC.

Problem: How to automate user registration in SUP? It is error prone to register them manually in Sybase Control Center – I’ve made mistakes myself and then tried to spent better part of a day trying to figure out what went wrong. Debugging iOS code was definitely not fun in this case even .And even if a person is not careless like me, it’s not feasible if the number of user is in hundreds and new users need to be added regularly.
I used Unwired Server Management APIs to automate the use registration. Approach at a high level :
– Develop a java program that will be executed as a daily batch job for user registration.
– The program will perform the following steps:
– Read list of users from SAP (e.g. all users of a defined role)
– Read list of users in already registered in SUP.
– For any new user found, perform registration using server management APIs.
I’m not pasting the entire code here but github link at the bottom of the page can be referred to look at the code . I’ll mention the basic building blocks in understanding the solution.
ABAP development:
We’ll need a RFC enabled function module which returns table of users which should be registered in SUP. The below code uses roles set in a custom table which is populated in lt_sup_roles.
Main part in ABAP code will be to get users based on SAP roles, which is in AGR_USERS table.
select uname
from agr_users into table users
for all entries in lt_sup_roles
where agr_name = lt_sup_roles-value.
Java Development :
We’ll need a Java program which will be executed as a daily batch job.
– The program needs to communicate to SAP ECC server to get the list of users and hence we’ll need to have JCo libraries added to the Java project.
– For communicating to SUP, some library files are needed . Here’s the link for the list and where to get them from:
This is required even if the program is run on SUP app server itself .
From experience, Juno version of Eclipse makes it really easy to export the project as a single jar file. Indigo required more work when trying to export the project as a jar with required libraries ( JCO, SUP libs and jar for property file ) .
The java program has the following overall steps:
- Create a property file so that the settings are configurable for dev, QA and prod.It has connection settings for SAP and SUP servers. You may create a jar file.
- Attach JCO and SUP library files.
- The basic structure of code is as follows:
Create three lists holding users in SAP , SUP and one for users to be added ( who are present in SAP but not yet in SUP ).
List<String> SAPUserlist = new ArrayList<String>();
List<String> SUPUserlist = new ArrayList<String>();
List<String> UserAddSAPlist = new ArrayList<String>();
Get the list of SAP users . Simple JCo call.
JCoDestination destination = JCoDestinationManager.getDestination(DESTINATION_NAME2);
JCoFunction function = destination.getRepository().getFunction(
“ZSD_SUP_GET_USER_LIST”);
JCoTable codes = function.getTableParameterList().getTable(“USERS”);
for (int i = 0; i < codes.getNumRows(); i++) {
codes.setRow(i);
SAPUserlist.add(codes.getString(“BNAME”)); }
Get the list of SUP users :
ServerContext serverContext = new ServerContext(host, intserverPort,admin, password, true);
String noll = “”;
ClusterContext clusterContext = new ClusterContext(serverContext, noll);
SUPApplication app = SUPObjectFactory.getSUPApplication(clusterContext);
PaginationResult<ApplicationConnectionVO> pag = new PaginationResult<ApplicationConnectionVO>();
AppConnectionFilterSortVO filter = new AppConnectionFilterSortVO();
int a = 0;
Long a1 = new Long(a);
int max = 200;
Integer max1 = new Integer(max);
pag = app.getApplicationConnections(filter, a1, max1);
int i = pag.getTotalAvailableRecords();
List<ApplicationConnectionVO> SUPlist = new ArrayList<ApplicationConnectionVO>();
SUPlist = pag.getItems();
for (int j = 0; j < SUPlist.size(); j++) {
- SUPUserlist.add(SUPlist.get(j).getApplicationUser().toUpperCase());
}
Now, create a new list for users to add the ones missing in SUP which are present in SAP.
for (int j = 0; j < SAPUserlist.size(); j++) {
if (SUPUserlist.contains(SAPUserlist.get(j)) == false) {
UserAddSAPlist.add(SAPUserlist.get(j));
}
}
Register the users in SUP.
AppConnectionRegistrationRequestVO acrrvo1 = new AppConnectionRegistrationRequestVO();
Collection<AppConnectionRegistrationRequestVO> vos = new ArrayList<AppConnectionRegistrationRequestVO>();
Map<APPCONNECTION_REGISTRATION, Object> req1 = new HashMap<APPCONNECTION_REGISTRATION, Object>();
req1.put(APPCONNECTION_REGISTRATION.USER_ID, UserAddSAPlist.get(j));
req1.put(APPCONNECTION_REGISTRATION.ACTIVATION_CODE, intactivationCode);
req1.put(APPCONNECTION_REGISTRATION.EXPIRATION_HOUR, intexpirationTime);
acrrvo1.setRequest(req1);
- vos.add(acrrvo1);
AppConnectionSettingVO settings = new AppConnectionSettingVO();
Map<APPCONNECTION_SETTING_FIELD, Object> settingMap = new HashMap<APPCONNECTION_SETTING_FIELD, Object>();
settingMap.put(APPCONNECTION_SETTING_FIELD.SERVER_NAME, host);
settings.setSetting(settingMap);
app.registerApplicationConnections(templateName, vos, settings);
Create a jar file for the project and use it to schedule a windows task on SUP server ( it should also work on any other server which has visibility to both SAP and SUP servers ).
The development can be further enhanced by removing users who are no longer active. For this to happen, the following could be checked:
– In ABAP : USR02 lock status as 32 or 64 ( i.e. locked by admin and not due to incorrect logins ) to get users to be removed.
– Update java program to add step for removal of users as well for the list derived above.
There was no real need in our case but could be useful depending on the business case and can be easily extended using above steps.
I’ve put the entire code on github: https://github.com/viksingh/SUPUserregn .
Tale of two MOOCs( Massive Open Online Courses):
Posted: November 16, 2013 Filed under: Learning | Tags: Education, java, JEE, mongoDB, MOOC, SAP Leave a commentMOOCs have started for courses from Universities some time back and I have used the one from Stanford for iOS development. Thanks Prof. Hegarty – If I had to do it again, I won’t necessarily do it in the same way ( it turned out to be very inefficient for a beginner who has a day job doing something else). The course definitely is good but has a relatively steep learning curve. It starts to get difficult if you have a day job.I found books more helpful to learn the fundamental concepts of Objective C.
However, it seems that the time has finally arrived for companies to start offering MOOCs for their development platform. Being in the SAP world, I have enrolled and finished the following:
From SAP:
– Introduction to Software Development on HANA : This was the first one from open.sap.com and it helped that it’s for HANA – the cool kid in SAP world these days.The course was well structured and the fact that it had practical tips on how to fire up AWS instances, create AMIs to save costs etc was very helpful. It was more HANA general rather than focusssed on ABAP on HANA.In the beginning it was a bit challenging ( especially week 2) but then it picked up a very good pace and I enjoyed working through it. Apart from HANA, the biggest message was – Ignore JS at your own peril.
-Mobile Development on SAP Platform : I have already worked on a project for an iOS application using SMP, supported it around for a year and have learnt a great deal about the differences between a mobile application development project compared with traditional application development projects.This course still proved to be very useful for couple of reasons:It had SAP Netweaver Gateway providing services in oData protocol for the backend.The course was more for developers who’re already able to build mobile applications and it’s focus was on presenting SMP as a MEAP that can be used for enterprises. I’m satisfied with this course.
– HANA Cloud Development : I have been doing a lot of Java development, especially in the last 3 years and I was happy to see JEE skills being useful here. The course creates a typical JEE application but using SAP HANA Cloud as a platform. I’m mid way through the course and have learnt some new things – e.g. document management service in a cloud application. I see cloud as the platform for future. Not only in SAP but also outside it – redhat is pushing for it’s ESB on cloud.
From MongoDB University:
I have signed up for MongoDB for Node.js developers course from MongoDb University. There are two things that I’m learning in the course.
– ALl my life has been with relational databases. This is the first time I’m doing any kind of work with a non relational database. Initially I found the idea very weird – what happened to schema ? However, thinking about iterative development – it doesn’t turn out to be a bad idea at all. In some ways, the schema is in the application and a collection ( entiity in the SQL world) can have different kind of data co-existing – before and after a patch to add a new field as an example.
– Node.js : I have done the pluralsight course but it’s good to apply it for a practical blog application.
